
Knowing exactly how to create an email signature in Gmail is a foundational professional skill that boosts your credibility and brand with every message you send. A well-designed signature acts as a dynamic digital business card, providing essential contact details, reinforcing your brand identity, and even driving traffic through strategic calls-to-action. This definitive guide will provide you with a clear, step-by-step walkthrough for both desktop and mobile, delve into advanced design principles that most tutorials miss, and introduce powerful tools for scaling this practice across an entire organization. By the end, you’ll be equipped to build a signature that is not only functional but also a genuine asset to your professional communication.
Understanding the Value of a Professional Gmail Signature
Before you start the setup, it’s crucial to frame your Gmail signature as a strategic tool, not just a footer. A professional signature instantly establishes trust and legitimacy with new contacts. It serves as a consistent brand touchpoint, ensuring your name, title, company, and visual identity are communicated clearly. From a marketing perspective, it’s a zero-cost channel for promotion—whether you’re highlighting a new product, linking to your latest blog post, or showcasing a professional certification. For businesses, consistent signatures across all employees amplify brand recognition and can include important legal disclaimers. In short, learning how to set up an email signature in Gmail effectively is an investment in your professional image.
Step-by-Step: How to Set Up Your Gmail Signature on Desktop
The most robust method for creating a Gmail signature is through the desktop web interface, which offers full formatting controls. Follow these detailed steps to ensure your signature is saved and applied correctly.
Navigating to the Signature Settings
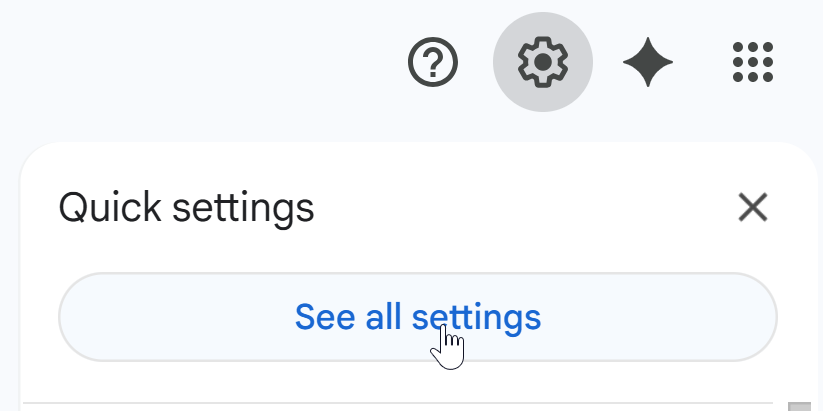
First, log into your Gmail account on a computer. In the top-right corner, click the gear icon (⚙️) to open "Quick settings," then click "See all settings." This takes you to the main Settings panel. Navigate to the "General" tab, which is open by default. Scroll down past themes and inbox options until you find the dedicated "Signature" section. This is the control center for all your signature creation.
Creating and Formatting Your Signature
In the Signature section, click the "Create new" button. You’ll be prompted to name your signature—use something clear like "Primary Business" or "Personal." A rich-text editor box will appear. Here, you can type your information. Use the formatting toolbar to make your name bold, adjust font sizes, and incorporate brand colors. To add hyperlinks (like linking your company name to your website), highlight the text, click the link icon (🔗), and enter the URL. To insert a logo or headshot, click the image icon, upload your file, and ensure it’s sized appropriately. Finally, use the dropdown menus below the editor to set this new signature as the default for "New emails" and "On reply/forward." Crucially, scroll to the very bottom of the Gmail Settings page and click "Save Changes" to activate your signature.
How to Add a Signature in the Gmail Mobile App
A critical and often overlooked detail is that the signature you create on desktop does not automatically sync to the Gmail mobile app. You must configure it separately within the app’s settings, and the mobile editor is text-only, limiting complex formatting.
- Open the Gmail app on your iOS or Android device.
- Tap the menu icon (☰) in the top-left corner.
- Scroll down and select "Settings."
- Choose the Gmail account you want to edit.
- Scroll down and tap "Mobile signature."
- In the text box, enter or paste a simplified version of your signature. Since images and special formatting often won't carry over, stick to clean text with your name, title, and most important contact link.
- Tap "OK" or the back arrow to save. Your signature will now appear on emails sent from your mobile device.
Professional Email Signature Design: Best Practices and Templates
Technical setup is only half the battle. A professional signature follows design principles that ensure clarity and impact. Start with a strong visual hierarchy: your Name (largest font, often bold), followed by your Job Title and Company. Then list key contact details like phone number, email, and website. Use a maximum of two font styles and keep the main text between 10-12pt for universal readability. Always include a high-quality, professional headshot or company logo to build familiarity. For your social media links, use small, consistent icon sets rather than text URLs. Most importantly, keep it minimalist—avoid overwhelming the recipient with too many colors, fonts, or lines of text. A cluttered signature appears unprofessional. For inspiration, you can explore professional email signature templates that balance all these elements.
Going Beyond Basics: Advanced Signature Features
To truly leverage your signature, consider these advanced elements that provide significant value.
Incorporating Email Signature Banners and CTAs
Transform your static signature into a dynamic marketing tool by adding a banner. This is a thin, graphic strip that promotes a specific call-to-action (CTA), such as "Download Our Q4 Report" or "Register for Our Webinar." You can create these in a simple graphic design tool. In your Gmail signature editor, click the image icon to upload the banner graphic, then immediately hyperlink it to the relevant landing page. This turns every email you send into a subtle promotional vehicle. For companies, managing these campaigns across a team is where a platform like Signtry becomes invaluable, allowing for centralized updates and analytics.
Adding Legal Disclaimers and Accessibility Features
For professionals in finance, law, healthcare, or other regulated industries, a legal disclaimer is often mandatory. This text should be placed below your primary contact info, typically in a smaller font size (e.g., 9pt). Furthermore, prioritize accessibility: add descriptive alt text to any images (like your logo) within the signature editor so screen readers can describe them. Ensure there is sufficient color contrast between text and background. These steps not only broaden your audience but also demonstrate professional diligence. For guidance on digital accessibility standards, reputable resources like the W3C's Web Content Accessibility Guidelines (WCAG) are authoritative references.
Solving Common Gmail Signature Problems
Even with correct setup, issues can occur. Here’s how to troubleshoot the most frequent problems:
- Signature Not Showing in New Emails: Double-check that you’ve selected the correct signature as the default in Gmail Settings > General > Signature. Also, ensure you clicked "Save Changes" at the very bottom of the Settings page.
- Formatting Looks Broken on Recipient's Side: Overly complex formatting with tables or multiple columns often breaks in different email clients. Stick to simple, linear layouts and test your signature by sending emails to different accounts (Outlook, Yahoo, Apple Mail).
- Images or Logos Not Displaying: If your logo appears as a broken image, it may be hosted on a private or blocked server. Consider using a publicly accessible URL or a dedicated signature management service that hosts images reliably.
- Different Signatures for Different Purposes: Gmail allows you to create multiple signatures. You can set a default for new emails and choose a different one (like a shorter version) for replies and forwards. You can also manually select a signature from the toolbar while composing an email.
For persistent technical issues with Gmail itself, consulting the official Gmail Signature Help page is always recommended.
Managing Signatures for an Entire Team or Company
For business owners and IT administrators, manually managing individual employee signatures is a time-consuming and inconsistent process. A unified brand image requires a centralized solution. This is where email signature management software delivers immense value. These platforms allow admins to create, deploy, and update branded signatures for every employee from a single dashboard. They can dynamically insert correct employee details from a directory (like Microsoft 365 or Google Workspace), enforce compliance with legal disclaimers, and run coordinated marketing banner campaigns. This ensures flawless brand consistency, reduces IT workload, and turns every employee email into a reliable marketing channel. Exploring the features of a platform like Signtry can reveal the scalability benefits for growing organizations.
Conclusion
Mastering how to create an email signature in Gmail is a multi-layered process that combines technical setup, thoughtful design, and strategic application. By following the detailed steps for desktop and mobile, adhering to minimalist design best practices, and leveraging advanced features like banners and disclaimers, you transform a simple footer into a powerful professional tool. For individuals, this elevates personal branding. For businesses, implementing a managed solution is the key to achieving consistency, compliance, and turning everyday communication into a measurable brand asset. Your signature is the final impression in every email—make it count.
Next Step
Ready to elevate your email communication beyond the basics of Gmail's built-in editor? Discover how easy it is to deploy consistent, professionally branded, and marketing-powered signatures across your entire team. Try Signtry now and experience centralized management, dynamic content, and detailed analytics. Start Now